WebFOCUS Online Help > Managed Reporting Developer > Working With Domains and Standard Reports > Importing Procedures and Other Files Into WebFOCUS

Importing Procedures and Other Files Into WebFOCUS

In this section:

How to:

Reference:

You can use existing FOCUS procedure files as Standard Reports in your WebFOCUS domains. You copy a procedure file, created in any platform and version of WebFOCUS, into a Repository's or Domain's Import directory. You then add the procedure file to a Standard Reports group folder through the New Standard Report dialog box.

When you click Add in the dialog box, WebFOCUS retrieves the procedure files in the Repository's or Domain's Import directory and displays them in the Add Files dialog box. It is from this list of files that you choose which ones to import.

Important:


Top of page

Reference: Usage Notes for Importing Procedures Into Managed Reporting

Top of page

Procedure: How to Import a Procedure File to Be Used As a Standard Report
  1. Locate the procedure file you want to import and copy it into either the Repository's or the Domain's Import directory.

    The Repository, the Domain directory, and the Repository's Import directory reside in the /install_directory/basedir directory on the Web Server. The Domain's Import directory resides in the Domain directory. The name of the Domain directory appears as only the first eight characters of the domain's description.

  2. Expand Managed Reporting in the Developer Studio WebFOCUS Environment area.
  3. Open the domain to which you want to add the file.
  4. Right-click a Standard Reports group folder, then select New Standard Report.
  5. Select Import External Files.

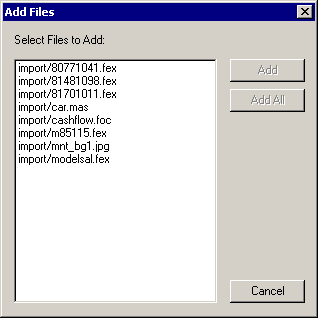
    The Add Files dialog box opens.

  6. From Select Files to Add, select the procedure file you want to import.
  7. Click Add.

    To add all the files, click Add All. WebFOCUS adds the procedure to the Standard Reports group folder.


Top of page

Procedure: How to Copy a Procedure From Windows Desktop to a Standard Report Folder
  1. From the Windows menu, select Options.
  2. Check Show Desktop on explorer tree and click OK.
  3. In the Windows Desktop node, navigate to the file you want to copy.
  4. Copy and paste or drag and drop the file to the Standard Reports folder in the Domain of your choice located under WebFOCUS Environments.

Top of page

Other Files

In addition to FOCUS procedure files, application component files (.fex, .gif, .sty, .htm) can be added to the WebFOCUS Repository or a domain component through the use of the Other Files component. For more information on adding StyleSheets (.sty), see Applying Predefined Style Sheets to a Report.

You use the Other Files component to list the application components stored in the Repository's or a Domain's Import directory. As with procedure files, any other files placed in the Repository's Import directory are accessible to every domain, while a file placed in a Domain's Import directory is available to only that domain.


Top of page

Procedure: How to Import Files Into the Other Files Folder
  1. Locate the existing procedure file or application component file (.fex, .gif, .sty, .htm) that you want to add to the Other Files folder and copy it into either the Repository's or the Domain's Import directory.

    The Repository, the Domain directory, and the Repository's Import directory reside in the /install directory/basedir directory on the Web Server. The Domain's Import directory resides in the Domain directory. The name of the Domain directory appears as only the first eight characters of the domain's description.

  2. In the Developer Studio WebFOCUS Environment area, expand Managed Reporting.
  3. Open the domain in which you want to add the file.
  4. Right-click the Other Files folder and select New Other Files.
  5. From the cascading menu, select Import External Files.

    The Add Files dialog box opens and displays the contents of the Repository's and the Domain's Import directory as shown in the following image.

    Tip: You can also right-click the Other Files folder and select Add Files from the pop-up menu.

  6. From Select Files to Add, select the files you want to add to the domain.
  7. Click Add.

    To add all the files, click Add All. The Add Files dialog box closes and returns you to Domain Builder. WebFOCUS displays the files under the Other Files folder.

  8. To copy HTML or procedure files into a Standard Reports group folder, right-click the newly added procedure files under Other Files, then select Cut or Copy.

    Note: Other application component files (.gif, .sty, .htm) must remain in the Other Files folder.

  9. Open the component folder and right-click the group folder to which you want to add the selected procedure files, and select Paste.

    WebFOCUS adds the procedure files to the group folder. In the Domains view, these Standard Reports can now be accessed from the Standard Reports tab.

  10. To prevent WebFOCUS from displaying a particular file on the Standard Reports tab in the Domains view:
    1. Right-click the procedure file from the group folder and select Properties.
    2. Deselect Show on User's List.
    3. In the Name input box, type a new description for the procedure file.
    4. Click OK.
  11. In the Developer Studio WebFOCUS Environment area, expand Managed Reporting.
  12. Open the domain in which you want to add the file.

Top of page

Procedure: How to Add HTML Files, StyleSheets, and Cascading Style Sheets to the Other Files Folder

  1. In the Developer Studio WebFOCUS Environment area, expand Managed Reporting.
  2. Open the domain in which you want to add the file.
  3. Right-click the Other Files folder, select New, and then select one of the following:
    • HTML File
    • WebFOCUS Style
    • Cascading Style

      Note: If you select Procedure, you will be prompted to create a new Standard Report.

  4. In the File name box, type the name of the file and, then, click Create.

Top of page

Procedure: How to View Other Files Properties

  1. Expand the domain that contains the Other file you want to review.
  2. Expand the Other folder and, then, right-click the HTML file, procedure, Cascading Style Sheet, or StyleSheet you want to review.
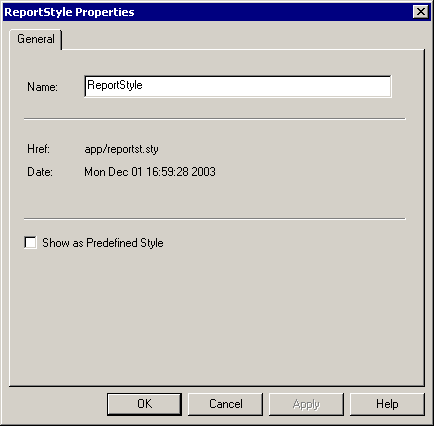
  3. Select Properties. The appropriate report Properties dialog box opens. For example, the Cascading Style Sheet Properties box looks like the following image:

    These dialog boxes list the name of the report, the date the report was created, and the file name for the report.

  4. To:
    • Change the report's name, type a new name in the Name input box.
    • Select amper auto-prompting, check the Prompt for Parameters check box.
    • Display as a report in the user environment, check the Show on User's List check box.
    • OLAP-enable the report, check the Run with OLAP check box.
    • Show as a predefined style, check Show as Predefined Style.

    Note: You can change any of these properties at any time.

  5. Click OK to save your changes or click Cancel to discard your changes.
Top of page

Importing and Managing End User Custom Reports

Using Developer Studio, Administrators can bring a procedure (FEX) into the Managed Reporting Repository from their local machine to the user's Custom Reports folder accessed from the User Management component. This is accomplished through a drag and drop action or a cut or copy and paste action. This feature applies only to Developer Studio.

In addition, the ability to create folders and cut or copy and paste procedures within or across folders within the Custom Reports folder has been added to the User Management component from Developer Studio and Domain Builder Applet and from the Domains Applet.

When a folder within a Custom Reports component or a specific Custom Report is selected, these options are enabled on the right-click menu and on the toolbar.


Top of page

Procedure: How to Import Custom Reports
  1. Open Developer Studio.
  2. From the Window menu, select Options.

    The Developer Studio Options dialog box opens.

  3. Ensure the Show Desktop on explorer tree check box in the Other Settings field is selected and click OK.
  4. Navigate to the procedure you want to copy, then right-click the procedure and select Copy from the menu.
  5. In the User Management component of the selected WebFOCUS Environment, navigate to the Custom Reports folder where you want to paste the procedure.
  6. Right-click the folder and select Paste from the menu.
  7. Paste the procedure into the appropriate folder.

Note: Alternatively, you can drag and drop the procedure from its original location to the Custom Reports folder. Note that when you do this, or when you cut the procedure instead of copy, the procedure is not removed from its original location.


WebFOCUS