WebFOCUS Online Help > Managed Reporting Administrator > Customizing Dashboard > Customizing the Banner
In this section: How to: |
You can customize the links that display in the banner area for the public user and for Group Views. You can also change the height of the banner, remove the banner, and display a welcome message in the banner.
From the Logo & Links window in the View Builder, you can customize the display of all links that are available to the public user and in Group Views. By default, the links available for Group Views are Logoff, Accessibility, Tree, Tools, Recent, Favorites, Group Views, Utilities, and Help.
When a user logs into Dashboard to their personal view (My View) all available links appear.
Note:
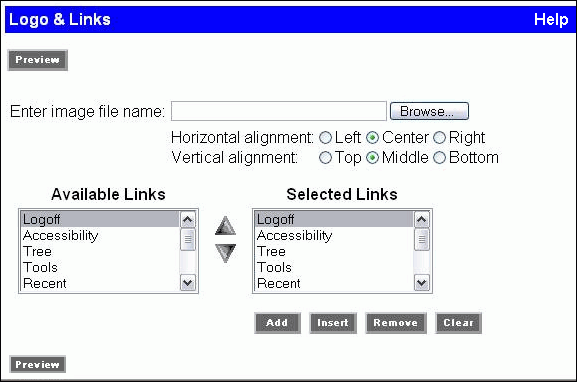
The following image shows the Logo & Links window containing the image filename text box for displaying company logo with option buttons indicating a left, center or right position, and an Available Links list box for adding links and a Selected Links list box to order the links.
The order the links display in the Selected Links list is how they appear in Dashboard. You can move the links using the up and down arrows between the Available Links and Selected Links lists.
The number of the folder depends on the template you have chosen. To determine the number, hover your mouse over the template in the Look window. Alternatively, the numbers are in order (0–7) from left to right starting with the top left template.
Note: The banner height must be a minimum of 50 pixels in order to sufficiently display the banner links. Some banner links, such as Help, have a drop-down menu associated with them. If the banner height is too small, the drop-down menu will not display and the functionality will not be available to the user.
A welcome message can be displayed in the left top corner of the banner, where the name of the user logged into the view appears as “Welcome, user name”, as shown in the following image.
The welcome message can be set to display globally in all views by editing a variable setting in the bid-config.xml file or set to display in specific views using the Dashboard View Builder. Note that the text in the welcome message inherits the same color used for the banner links.
<internal-var name="showBannerUserGreeting" value="false"/>
to
<internal-var name="showBannerUserGreeting" value="true"/>
Note: After making changes to the bid-config.xml file, use the WebFOCUS Console to clear memory cache, or restart the application. Until this is done, the change is not effective.
For more information about using the Edit Settings functionality in the Dashboard View Builder, see Customizing Dashboard Pages for a Public or Group View.
| WebFOCUS |