WebFOCUS Online Help > ReportCaster Development and Administration > Report Library > Accessing Library Content
In this section: |
The Report Library interface provides access to content in the library that you have permission to view. In addition to viewing content, you can delete content from the library, and put items on the Library Watch List. The Library Watch List interface, accessed through a tab in the Report Library interface, allows you to track and focus on content that is of special interest to you.
There are several ways to access the Report Library interface:
If you receive such an e-mail, open the e-mail and click the link to the library content. When the logon window opens, type your ReportCaster user ID and password. After a successful logon, you are sent directly to the specified output within the Report Library interface. Note that there is a link back to the Report Library interface, so that you can view additional content to which you have access.
Note: hostname[:port] is the host name and optional port number of the Application Server where the ReportCaster Web application is deployed, and rc_context_root is the site-customized context root for the ReportCaster Web application deployed on your Application Server (rcaster is the default context root value).
http://hostname[:port]/rc_context_root/library/liblogon.jsp
where:
Is the host name and optional port number (specified only if you are not using the default port number) of the Application Server where the ReportCaster Web application is deployed.
Is the site-customized context root for the ReportCaster Web application deployed on your Application Server. The default value is rcaster.
When the Report Library logon page opens, type your ReportCaster user ID and password. After a successful logon, you can view all content to which you have access in the Report Library.
From the WebFOCUS Welcome page, click the ReportCaster, Report Library Content option.
The WebFOCUS Welcome page is located at the following URL:
http://hostname[:port]/wf_context_root/welcome.jsp
where:
Is the host name and optional port number (specified only if you are not using the default port number) where the WebFOCUS Web application is deployed.
Is the site-customized context root for the WebFOCUS Web application deployed on your Application Server. The default value is ibi_apps.
Note: The Report Library option to change your ReportCaster user ID password should not be used when ReportCaster is configured with Managed Reporting. This is because this option only updates the password in the ReportCaster Repository and not the Managed Reporting Repository. If this option is used, the user must also use the Managed Reporting change password option to update the password in the Managed Reporting Repository.
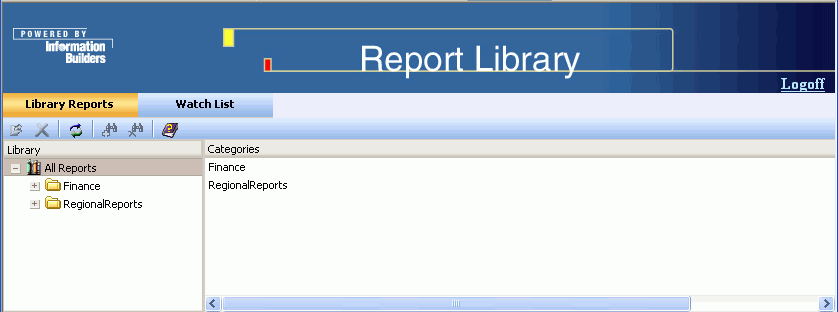
The Report Library interface, shown in the following image, includes two tabs:
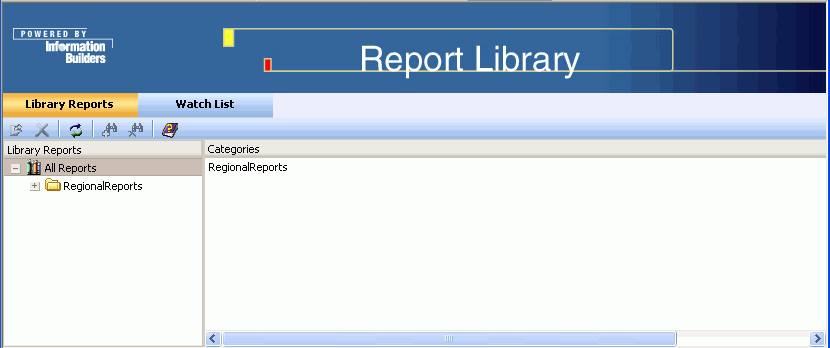
The Report Library interface Library Reports tab opens the Library Reports interface, which provides access to all content in the library that you have permission to view. The Library Reports interface, shown in the following image, displays the Library Reports navigation tree in the left pane and the details of the selected item in the right pane.
Note: Whether you are a ReportCaster Administrator or an end user, you can only view reports that you own, that are public, or that are protected by an Access List of which you are a member.
Reports are stored in the library under categories that you name when creating a schedule or the domain name under which the Standard Report or My Report was created in Managed Reporting. The top of the navigation tree in the left pane is titled All Reports, and when expanded, displays the categories and domains under which your reports reside as branches of the tree. This information also appears in the right pane. The categories and reports are listed alphabetically.
Each category folder contains report folders for that category, and each report folder contains the versions of the report generated by the report schedule. The report folder name is the same as the description given to the schedule that generated the report. If the report is burst, the report folder contains a folder for each burst value and the report versions reside in those folders.
In the Library Reports interface, select an item in the left pane to see the contents and information about that item in the right pane. When you select a category folder, a list of reports in the category appears in the right pane. When you select a report folder, all versions of that report that are currently in the library appear in the right pane. When you select a report version in the left pane, the actual report appears in the right pane.
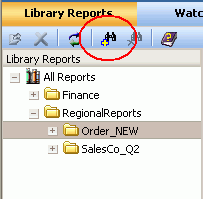
The Library Reports interface toolbar contains Open, Delete, Refresh, Subscribe, Unsubscribe, and Help action icons. These icons are available when the action is appropriate for the item you select.
To view library content:
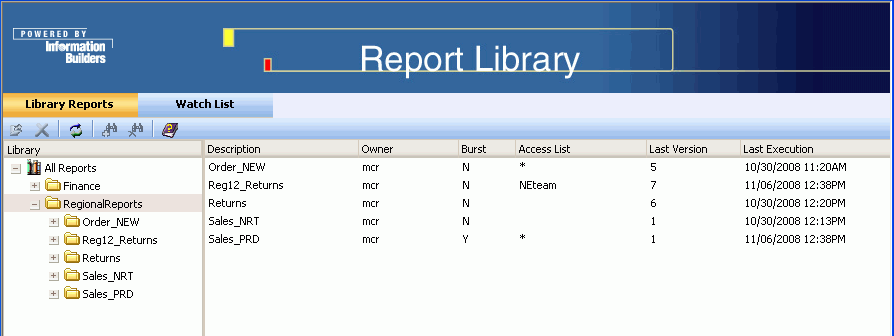
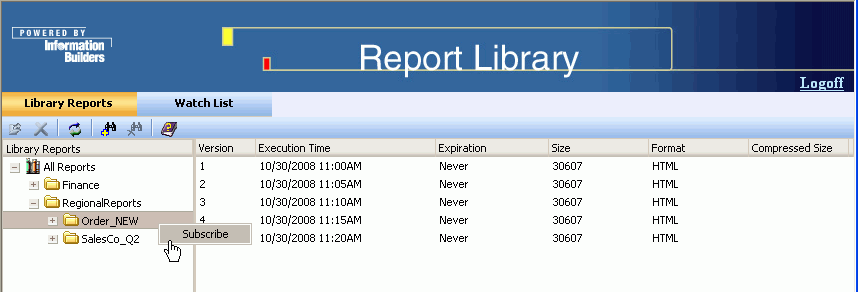
The right pane displays a list of report folders that appear under that category. The following image shows an example of a selected category (RegionalReports) and the summary information for the reports (Order_NEW, Reg12_Returns, and so on) that appear under that category.
The category folder summary information includes:
Note: You can sort the columns in ascending or descending order by clicking the column heading.
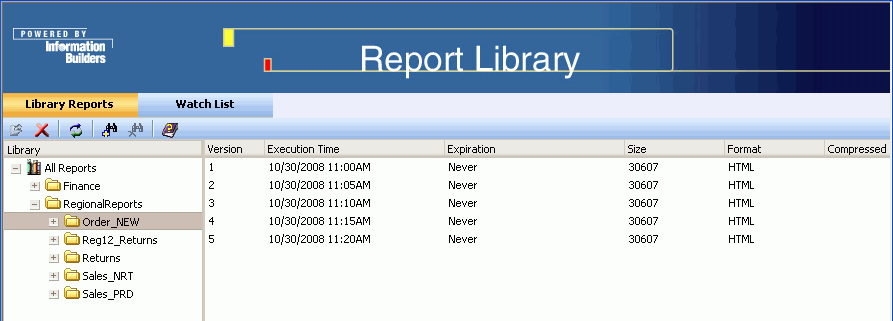
The following image shows an example of a report (Order_NEW) selected in the navigation pane and the list of its five versions in the right pane.
The report summary information includes:
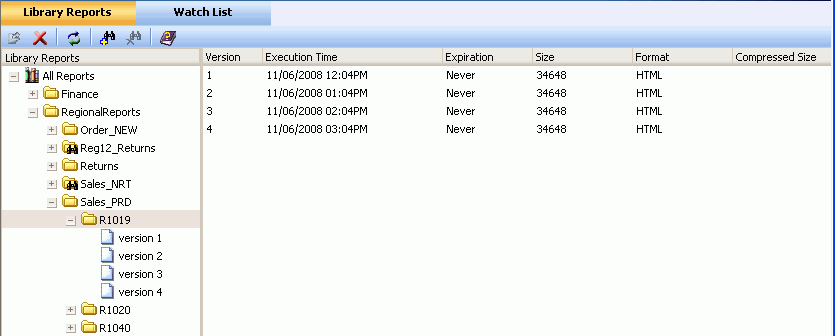
If a report is burst, the report folder contains a separate folder for each burst value.
In the following image, the left pane shows that the Sales_PRD report folder contains the folders for each report burst on the product code value (for example, R1019, R1020, and so on), while the right pane provides summary information about these burst reports.
The burst report summary information includes:
Select a burst report folder in the left pane to display report summary information of the versions for that burst value in the right pane, as shown in the following image. This is the same report summary information that is displayed for any report folder.
The following image is an example of a report (version 2 of Order_NEW) displayed in the right pane.
The Library Watch List provides a way to easily track reports and focus on information that is of interest to you. You can add any report in the library that is accessible to you to the Watch List, whether or not you own it. When you add (subscribe) a report to the Watch List, you are notified by e-mail whenever a new version of that report is distributed to the library. Only the latest version of the report is available in the Watch List interface. While all versions, including the latest, are available to you in the Library Reports interface, the Watch List gives you quick access to the most current report without having to search through the entire library content.
The Watch List interface toolbar contains Open, Delete, Refresh, Subscribe, Unsubscribe, and Help action icons. These icons are available when the action is appropriate for the item you select.
When using the Library Watch List, you can add reports to and delete reports from the Watch List, view summary information about a report, and view the current version of the report.
To add a report to the Watch List:
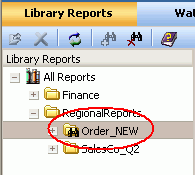
You can only subscribe the report folder to the Watch List, and not a category folder. The plus sign in the Subscribe icon is activated, as shown in the following image, when you select a folder that can be subscribed.
If a report is burst, you can only subscribe the report for an individual burst value and not the entire report. The following image shows a burst value report (R1019) that is selected for subscription to the Watch List.
The report is moved to the Watch List interface, as shown in the following image. Notice that only the most current version of the report appears in the Watch List.
In addition, the Library Reports interface shows a binocular icon as part of the report folder to indicate it is on the Watch List, as shown in the following image.
To see summary information about the reports in the Watch List, select All Reports in the left pane. The following information about the Watch List reports appears in the right pane:
To view the contents of a report, select the report in the left pane and the report content appears in the right pane. The following image shows an example of a report in the Watch List.
To remove a report from the Watch List, do one of the following:
To delete content from the library, you must be in the Library Reports interface. You cannot delete library content while in the Watch List interface. You can only delete content that you own.
Note: In the Library Reports interface, you can only delete the content that you own, whether you are a ReportCaster Administrator or an end user. However, the ReportCaster Administrator can delete library content through the Library Management tool. For more information on this tool, see Library Management.
The delete option (available from the right-click drop-down list or from the Delete icon in the toolbar) is only available for reports that you own, and for those items that can be deleted. For example, you cannot delete a report folder until you delete all of the content (report versions) under that folder.
When you delete a version of a report, ReportCaster does not renumber the remaining versions. For example, if there are six versions of a report and you delete versions 1, 2, and 4, the remaining versions are 3, 5, and 6, and the next version of this report to be distributed to the library will be version 7.
When you delete a report that is on the Watch List, the Watch List interface still contains the report icon in the left pane, but rather than the report, a document icon with a red X appears in the right pane. This reminds you that a report is still on the Watch List even though there is no content currently available, and it also makes you aware of reports that you do not own that have been deleted.
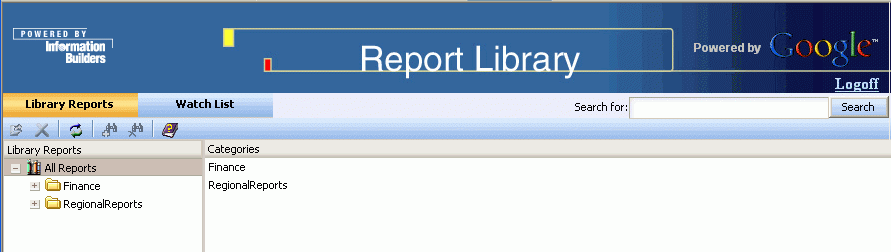
The Report Library provides the ability to search for content using the Google search engine. This feature requires an installed Google Search Appliance product and the configuration steps described in Report Library Integration With the Google Search Engine. After completing these configuration steps, you can use the Google search engine to locate content stored in the Library.
The Search for input box appears in the upper right corner of the screen, as shown in the following image.
Input your search string and click Search (or press Enter). The following image shows a search for instances of the word "SALES" throughout the Report Library.
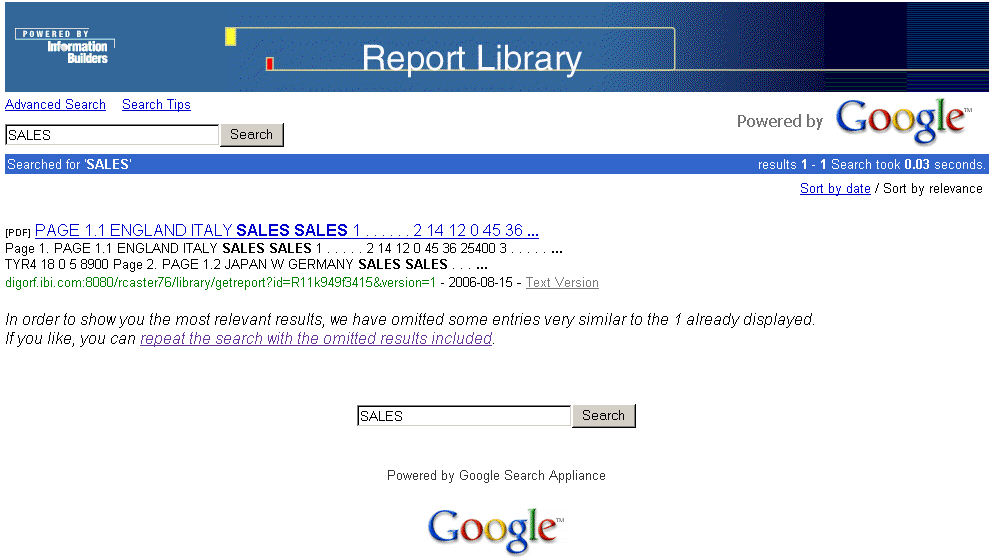
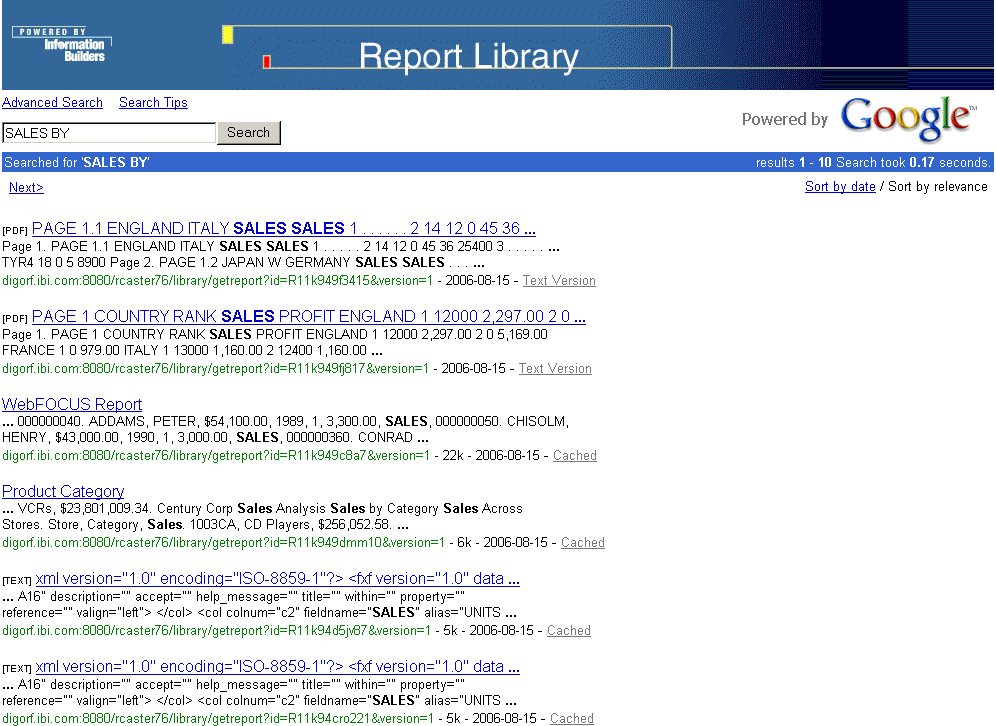
A separate browser window opens displaying links to the most relevant reports containing the search string. The following image is an example of a browser window that shows the most relevant result from a search on the word "SALES". The search result also includes information such as the report format, the machine on which the report resides, the version, and the date the report was indexed and inserted into the library. Note that relevance is determined by Google's own proprietary ordering, and that you can also sort by date. Only links containing reports you are authorized to view appear. The Google search results do not include page or result counts since the Report Library uses the Google Search Appliance in its secured form. You can further narrow down your search by adding elements to your string, for example, searching "SALES BY" rather than "SALES".
Click the repeat the search with the omitted results included link to display more results on the page, as shown in the following image.
Click the link of the report you want to view, for example, Product Category. The report is displayed, as shown in the following image.
The PDF Drill-Through feature enables Report Library users to move from a summary report to a detail report, both of which are packaged together in a single PDF compound report. Drill-Through functionality is similar to Drill‑Down functionality except Drill‑Through reports are static. A PDF document is produced that contains the summary report plus a detail report, with the detail report containing all the detail data for all the line items in the summary report. Clicking a Drill‑Through hyperlink navigates internally within the PDF file. No additional reports are run. The PDF file can be distributed to the library using ReportCaster, and when opened with Adobe Acrobat Reader, retains its full Drill‑Through functionality.
For more information about the PDF Drill‑Through feature, see Creating Drill Through PDF Compound Reports in the Displaying Report Data chapter in the Creating Reports With WebFOCUS Language manual.
| WebFOCUS |