WebFOCUS Online Help > Managed Reporting Administrator > Customizing Dashboard > Selecting a Template
In this section: How to: |
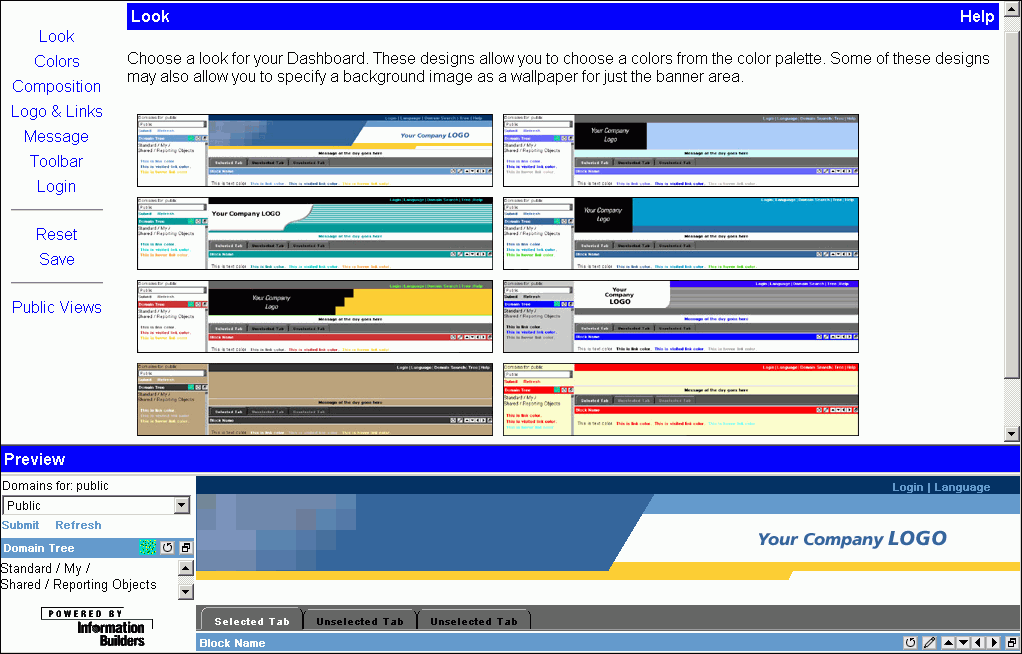
You can select a template for the Dashboard interface from the Look window in the View Builder. A different template can be selected for each public and group view.
The following image shows the Look window divided into two parts. The top part of the window contains thumbnails of template styles and the bottom part is the preview of a selected template.
There are several templates available, each with different options. The options include selecting custom colors and selecting a background image. For descriptions of all the templates, see Dashboard Templates.
There are two templates available from the Look window in the View Builder that you can use to create a Dashboard view that does not have a separate area for the logo embedded in the banner.
Additionally, you can create a custom template for your Dashboard view and access it through the View Builder.
In this directory there are folders for each of the Dashboard looks, or templates (worp0 through worp7).
The new directory name should begin with "custom_", for example "custom_new".
This file contains two references to the directory name for the template. Change both of these references to reflect the new directory name. If you do not make these changes, your template will still work correctly. However, these references need to be updated for the Dashboard Migration Utility to correctly migrate the views that use the custom templates.
The tags bg1, bg2, etc. should be maintained in these files so that the color selections appear in the View Builder Colors page.
Note: When you make changes to the view outside of the View Builder, you will need to go back into the View Builder and select your customized view again in order to see your changes reflected in the template.
Following are the templates available for Dashboard. The numbers correspond to the thumbnail images in the Look window. If you place your mouse over the thumbnail, the name of the template appears. For example, template 1 would appear as WORP0.
Template 1 (WORP0)
The colors for this template are customizable. The following image shows the first template containing the white background with muted blue and mustard yellow foreground color and text.
Template 2 (WORP1)
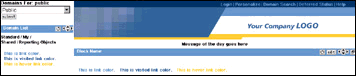
The colors for this template are customizable. You may also use an image for a wallpaper effect in the banner background area. The following image shows the first template containing the white background with two shades of blue and gray for foreground color and text.
Template 3 (WORP2)
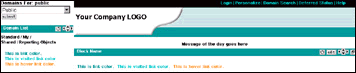
The colors for this template are customizable. You may also use an image for a wallpaper effect in the banner background area. The following image shows the first template containing the white background with two shades of muted green and mustard yellow for foreground color and text.
Template 4 (WORP3)
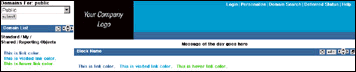
The colors for this template are customizable. You may also use an image for a wallpaper effect in the banner background area. The following image shows the first template containing the white background with dark shades of blue and green for foreground color and text.
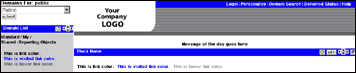
Template 5 (WORP4)
The colors for this template are customizable. The following image shows the first template containing the white background with red and mustard yellow for foreground color and text.
Template 6 (WORP5)
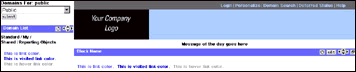
The colors for this template are customizable. The following image shows the first template containing the white background with gray and blue for foreground color.
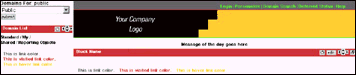
Template 7 (WORP6)
The colors for this template are customizable. You may also use an image for a wallpaper effect in the banner background area. This template does not require a logo.
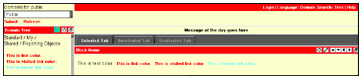
Template 8 (WORP7)
The colors for this template are customizable. You may also use an image for a wallpaper effect in the banner background area. This template does not require a logo and the banner is shorter than the other templates.
| WebFOCUS |