Procedure: How to Configure License Codes for Optional Products
-
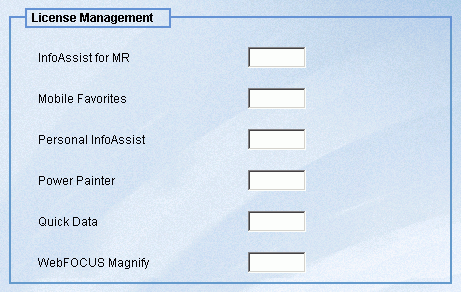
Click Utilities and
then License Management. The License Management
window appears with license code fields for InfoAssist for MR, Mobile
Favorites, Personal InfoAssist, Power Painter, Quick Data, and WebFOCUS
Magnify. If you specified a value for the WebFOCUS Magnify license
code during installation, then that value is already populated.
The following image shows the License Management window with no
values populated.
Note: The License Management menu option only appears if you have purchased the Comprehensive User Services license for Managed Reporting or WebFOCUS Magnify.
- Type the InfoAssist license code in the InfoAssist for MR field.
- Type the Mobile Favorites license code in the Mobile Favorites field.
- Type the Personal InfoAssist license code in the Personal InfoAssist field.
- Type the Power Painter license code in the Power Painter field.
- Type the WebFOCUS Quick Data license code in the Quick Data field.
- Type the WebFOCUS Magnify license code in the WebFOCUS Magnify field.
- Click Save to save your changes.
You must reload your WebFOCUS Web application in order for your changes to take effect. In addition, if you have enabled the InfoAssist, Power Painter, Quick Data, or Mobile Favorites features, users must log out of Managed Reporting and log back in.