WebFOCUS
Online Help > Managed Reporting End User > Creating a Graph With Graph Assistant > Running, Saving, and Printing Your Graph
Running, Saving, and Printing Your Graph
In this section: How to: Reference: |
When you run your graph, you may print the output directly from
the browser.
Note: If your graph labels or legends are not appearing
correctly when you run your graph, see How to Change Color Settings for
details on correcting this.
If you log off Managed Reporting
without first closing the HTML Graph Assistant, you must manually
close the tool.
Procedure: How to Save Your Graph From the Graph Assistant
-
Click Save or Save
As from the Graph Assistant.
-
From
the Save New Standard Report dialog box, enter a name for the graph.
Note: If
you are editing an existing graph, clicking Save will automatically
save the edits to the current graph file. You will not be prompted
to name the file again.
Procedure: How to Save Your Graph to a File
Note: You
must create a FileDef before you save a graph to a file. This is
where the file will be saved to. For details, see the Developing Reporting
Applications manual.
-
Click
the Properties tab of the Graph Assistant.
-
Click
the Options subtab.
-
Select File from
the Output to list box.
-
Type
the filename in the Name text box.
-
Select
either HPNG, JPEG, GIF, PDF/SVG,
or PDF/GIF from the format list box. The
default is PNG.
-
Click Run.
The output file is saved in the directory specified in the FileDef
if the IBIJAVAPATH has been set as a system environmental variable.
Otherwise, the output appears in the browser in the specified format.
From the browser you can save the graph on your local system.
Note: You
may open your output file by selecting Open from
the File menu in your browser.
When saving a graph as a GIF
file, if the graph contains a second horizontal category (that is
a horizontal field that produces multiple graphs), the value in
the HEADING will not be saved as part of the GIF file. Instead,
the horizontal field name will be embedded in the graph's page heading
to identify the graph.
Reference: Saving Options
When
you click the Save or Save As button you save your report (procedure).
If you make changes in your report without subsequently saving them
and then click Quit, you are prompted with the following options:
-
Yes. Click
to save your changes and exit the report.
-
No. Click
to discard your changes and exit the report.
-
Cancel. Click
to return to your report to continue working or use Save or Save
As to save your changes and then click Quit to exit your report.
Note: In the HTML
Graph Assistant, if you close the window by clicking the X, your
changes will not be saved.
Procedure: How to Run Your Graph
After
creating your graph in the Graph Assistant, click Run from
any tab in the Graph Assistant to view your graph output.
When
running graphs in GIF format on a UNIX platform with the HEADLESS configuration,
the graph may not appear properly. You may see a red X instead of
your image. This is due to Sun's methodology of creating images
without a head, which does not currently support GIF images.
Note: Running
applet graphs in the HTML Graph Assistant with the setting GRAPHENGINE=OLD
works with both Sun's and Microsoft's VM. Applet graphs with the setting
GRAPHENGINE=NEW work only with Sun's VM. If you have a graph with
the setting GRAPHENGINE=NEW and you are using Microsoft VM, you
should either update your Java Plug-in or change your GRAPHENGINE
setting.
GRAPHENGINE=NEW
and GRAPHEDIT=ON are mutually exclusive. If you specify GRAPHEDIT=ON
and GRAPHENGINE=NEW, you get an error message stating that GRAPHEDIT=ON
is not supported with GRAPHENGINE=NEW.
Procedure: How to Print Your Graph
-
Run
your graph.
-
From
the browser, select Print from the File menu.
Procedure: How to Send Graph Output Directly to a Printer
-
From
the Properties tab, click the Options subtab.
-
Select Printer from
the Output list box.
You do not need to provide a name or select a format.
-
Click Run.
The graph prints to your default printer setting.
Procedure: How to Change Color Settings
-
From
the Windows Control Panel, select Display.
-
Click
the Settings tab.
-
In the
Color palette box, click the drop-down arrow and select True Color (32
bit) or a higher color count.
-
Click OK.
If you
use different color settings from this recommended value, your graphs may
appear in grayscale format.
Following are descriptions of
the graph display formats:
Reference: Choosing Formats for Output to the Screen, a File, or Printer
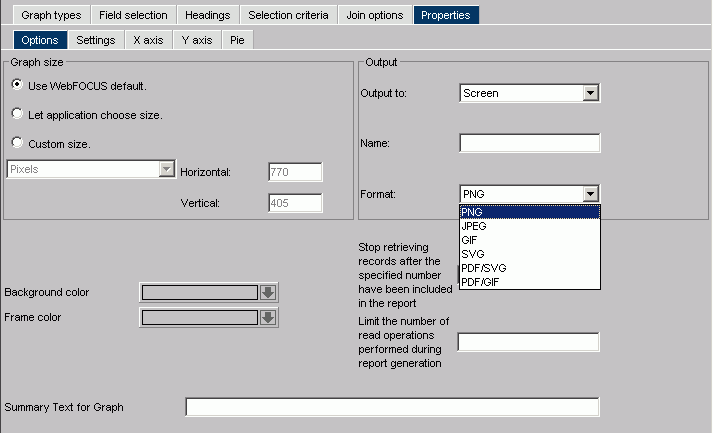
When
you create or edit a graph in Graph Assistant, you can choose among
these formats in the Output section in the Options tab. If you are
designating Output To the Screen, all options listed in Graph Display Formats are available,
as shown in the Format drop-down list.
The
following image shows the Options subtab.
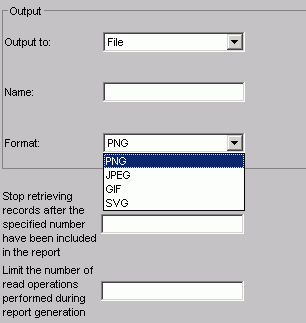
If you are designating
Output to File, the PNG, JPEG, GIF, and SVG options are available.
The following image shows the Output section
of the Options subtab with the Output to File option selected.
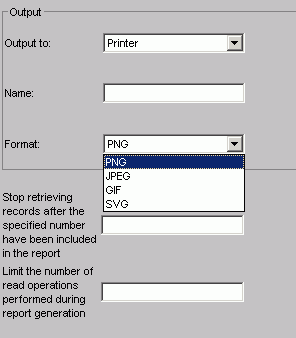
If you are designating
Output to a Printer, the PNG, GIF, and SVG options also are available.
The following image shows
the Output section of the Options tab with the Output to Printer
option selected.