WebFOCUS
Online Help > Managed Reporting End User > Using Power Painter > Customizing the Power Painter Environment
Customizing the Power Painter Environment
After the objects are in the canvas, you can customize
the layout properties, alignment options, and page to configure
the canvas for precise output. You can also adjust the work area
and change the theme of the Power Painter environment.
When you access the Edit menu and select Preferences,
the following dialog box appears where you can set preferences for
various defaults.
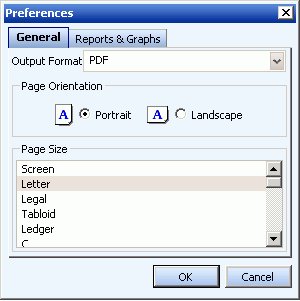
The Preferences dialog contains a General tab and a Reports and
Graphs tab. The General tab enables you to select Output Format,
Page Orientation, and Page Size options. The Reports and Graphs
tab enables you to select a Preview option and set a Record Limit for
both reports and graphs, select a Default Stylesheet for reports,
and select a Default Template for graphs.
Note: These settings do not affect the current Power Painter
session. The new settings are applied the next time Power Painter
is opened.
Setting Field Display Options
When you access the View menu and select Field Display
Options, another menu opens providing you with options to display
fields as a Name, Alias, Title, or Description. You can also choose
the Prefix with option to prefix fields with a filename or segment
name.
Adjusting the Layout of Objects in the Canvas
You can use the main toolbar and the Layout menu to
adjust the layout of objects in the Power Painter canvas. The following
layout options are available:
- Show grids,
rulers, and guides in the canvas to fulfill pixel-perfect positioning requirements.
- Align and size
objects in the canvas.
Reference: Showing Grids, Rulers, and Guides in the Canvas
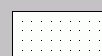
- To show grids in
the canvas, select Show Grid from the Layout
menu or click the Toggle Grid icon from the main toolbar.
The following image is an
example of how the canvas appears with grids showing.
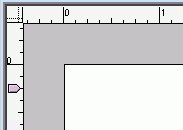
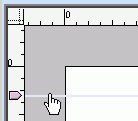
- To show rulers in the canvas,
select Show Rulers from the Layout menu.
The
following image is an example of how the canvas appears with rulers showing.
- To show guides in
the canvas, select Show Guides from the Layout
menu.
The following image is an example of how the canvas appears
with guides showing.
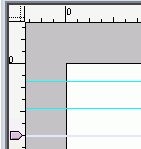
Tip: Use
the ruler to click and drag guides onto the canvas. Guides are indicated
by the aqua line.
- To show flow margins in
canvas, select Show Flow Margins from the
Layout menu.
The following image is an example of how the canvas
appears with flow margins showing. Flow margins are indicated by
the light blue line.
Tip: You
can left-click on the horizontal ruler or the vertical ruler and
drag the flow margins up and down the canvas.
The
following image shows the Layout menu in Power Painter.

Reference: Aligning and Sizing Objects in the Canvas
You
can align objects relative to one another or to the canvas. Alignment
options are available from the Layout menu or from the main toolbar.
- Align objects
to the page by using the align options from the main toolbar.
- Align multiple
objects to each other using the Align Items option from the Layout menu.
- Size objects
to be the same size by using the Size Items option from the Layout menu.
- Use the Relative
Positioning options to maintain the relative position of the objects to
each other at run time. The Relative Positioning options are Relate
Objects, and Show Relationships-available from the main toolbar
or Layout menu.
The following image shows the main toolbar
in Power Painter.

Adjusting the Power Painter Work Area
Click anywhere on the canvas and select the Document
properties palette to adjust the document properties.
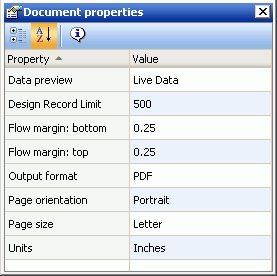
-
Data preview
-
Shows live data or sample data for reports and graphs.
Note: By
default, sample data is shown in the Power Painter canvas.
-
Design Record Limit
-
Sets the number or records to be shown when gathering data
for reports and graphs.
Note: The default record limit
value for the report is 500.
-
Flow margin: bottom
-
Sets the bottom margin for flowing reports.
-
Flow margin: top
-
Sets the top margin for flowing reports.
-
Output format
-
Enables you to select the output format from the following
options: PDF, DHTML, Power Point, Active Report, or Excel.
-
Page orientation
-
Sets the page orientation of the document. Select either
Portrait or Landscape.
Note: Portrait is the default
page orientation.
-
Page size
-
Sets the page size of the document. Use the drop-down list
to select a page orientation option.
Note: Letter is
the default page orientation.
-
Units
-
Specifies the unit of measurements for the tool. Select Inches,
Centimeters, or Points.
Note: Inches is the default
unit of measurement.
Changing the Theme of the Power Painter Environment
Power Painter enables you to customize your environment
for seamless integration with your organization's color scheme.
From the View menu, select Theme to access
the available skins to choose from.

The Power Painter environment changes to the theme of the environment
that you have selected.