WebFOCUS Online Help > Managed Reporting Developer > Creating Reporting Objects > Customizing a Join in the Browser

Customizing a Join in the Browser

How to:

You use the Join Properties dialog box to view the actual WebFOCUS code that defines a join, create single instance (unique) joins, rename the join, or delete the join.

The Join Tool assigns a unique default name to each join you create in a Reporting Object. The default names are J1 for the first join, J2 for the second, J3 for the third, and so on. You use these names to access a join's Properties dialog box.

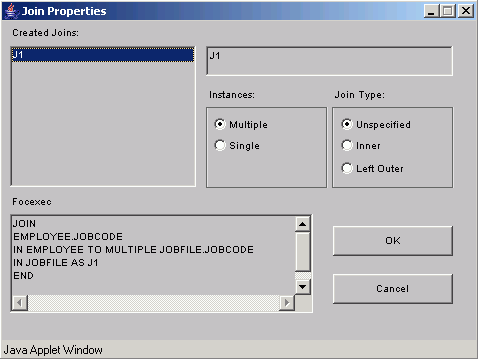
The following image shows the Join Properties dialog box containing the name of the created join and the WebFOCUS syntax for the join.


Top of page

Procedure: How to Display Join Syntax in the Browser
  1. In the Join Tool window's toolbar, click the Joins icon.

    The Join Properties dialog box opens.

  2. Select a join from the Created Joins list.

    The WebFOCUS code that defines the join appears in the Focexec box. You cannot edit this code; you can only view it.


Top of page

Procedure: How to Create a Single Instance (Unique) Join in the Browser
  1. In the Join Tool window's toolbar, click the Joins icon.

    The Join Properties dialog box opens.

  2. Select the Single Instance option button.
  3. Click OK.

Top of page

Procedure: How to Rename a Join in the Browser
  1. In the Join Tool window's toolbar, click the Joins icon.

    The Join Properties dialog box opens.

  2. Select a join from the Created Joins list.
  3. In the adjacent text box, type a name for the join.
  4. Click OK in the Join Properties dialog box.

    Note: Alternatively, you can change the join name from the Link Properties dialog box. You can access this dialog box by right-clicking the arrow in the join's connector line in the Join Tool window.


Top of page

Procedure: How to Delete a Join in the Browser
  1. Open the Join Tool.
  2. In the Join Tool window, right-click the arrow in the join's connector line.

    The Link Properties dialog box opens.

  3. From the Link Properties dialog box, click the Delete Link button.

    The Join Tool deletes the link and you return to the Join Tool window. Notice that the Join Tool removed the join connector line and the red and blue buttons associated with the join.


WebFOCUS