WebFOCUS
Online Help > Managed Reporting End User > Creating a Report With Report Assistant > Customizing Headings and Footings
Customizing Headings and Footings
Use the Report headings tab to specify the content, style, and
placement of headings and footings in your report. Headings and
footings can be customized only if a StyleSheet has not been applied.
Since Report Assistant applies a StyleSheet by default, you must
set the StyleSheet in the Report Options tab to None.
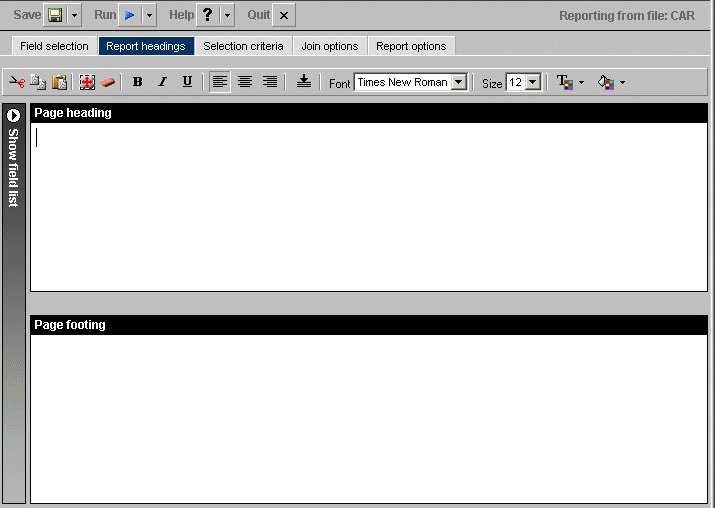
The following image shows the Report headings tab opened with
a formatting tool bar, the Page heading and the Page footing text
boxes.
Note: Dragging and dropping items, including images, is
not supported in the Report Assistant.
Procedure: How to Add and Align a Heading in a Report
-
In the
Report headings tab, click in the text box or press Alt+H to
enter a page heading title.
-
Click
the Center icon to center the heading in the
report. The heading is left-aligned by default.
Procedure: How to Add and Align a Footing in a Report
-
In the
Report headings tab, click in the text box or press Alt+F to
enter a page footing title.
-
Click
the Center icon to center the footing on the
report. The footing is left-aligned by default.
-
Click
the Bottom icon to place the footing at the
bottom of the report.
Procedure: How to Include a Field in a Heading or Footing
You
can include a specified field in a heading or footing. When you
run the report, the data value for the field will be included in
the heading or footing.
-
Click
the Show fields list icon to the left of
the Report headings box to display the Available Fields window.
-
Select
a field from the Available Fields window and drag the field to the Page
heading or Page footing box.
or
Click and hold the left mouse button, and drag
the field to the fields box you chose.
or
Use the shortcut
keys to quickly go to one of the field boxes.
In the following
table, the first column (Field Box) describes where you go when
you use the shortcut key combination described in the second column
(Shortcut Keys).
|
Field Box
|
Shortcut Keys
|
|---|
|
Page Heading
|
Alt+H
|
|
Page Footing
|
Alt+F
|
Press Alt+M to go
to the Available Fields window, tab to the field and press Enter to
add the chosen field in the page heading or footing text box.
Note:
- You can add
more than one field name to either the Page heading or Page footing
box by selecting one field at a time.
- The report's
heading or footing will contain the first value retrieved for the
field in the heading or footing.
Procedure: How to Style a Heading or Footing
To
style a heading or footing:
-
Select
the field you want to style in the Page heading or the Page footing
text box in the Report headings tab.
-
Click
the Cut, Copy, Paste, Select
all, and Remove formatting icons
to format the text of your choice.
-
Click
the appropriate icons to bold, italicize, or underline your text.
-
Click
the icons for left, center, or right alignment to specify justification.
-
Click
the Bottom icon to move your text to the bottom
of the report.
-
Click
the Font list box or press Alt+N to specify your
selections.
Note: When selecting a font, be sure to click in
the text box before you select the font name, otherwise the font
may return to the original font selection.
-
Click
the Font Size list box or press Alt+S to specify
your selections.
-
Click
the Text Color icon or press Alt+C and Enter to
open the Color palette window. Choose a color from the color list.
-
Click
the Background Color icon or press Alt+B and Enter to
open the Color palette window. Choose a color from the color list.
-
Click Save or Save
As to save your settings.
Note: The
default styling settings are as follows:
- Font: Times
New Roman
- Size: 13 (If
you change the font size of your heading, which is a FOCUS title,
the code may not properly reflect the font size you specified when
you open the procedure in a text editor. This does not affect functionality.
You can edit the procedure manually to correct the size.)
- Style: Normal
- Text Color:
Black
- Background Color:
Transparent
- Justify: Left