WebFOCUS
Online Help > ReportCaster End User > Maintaining a Schedule > Purging the Log File
The log file accumulates information and can become difficult
to navigate. Information Builders recommends that you periodically
purge log records to conserve space.
There is a configuration setting that ReportCaster Administrators
can configure that automatically purges log reports when they are
older than a set number of days. To find out how long your log reports
will be available, see your ReportCaster Administrator.
You can purge the log file in one of two ways:
-
Purge log file information for specific schedules. Select
one or more schedules and then click Purge.
The Purge Log Web Page Dialog box opens.
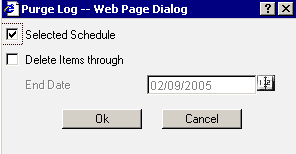
The Purge Log Web Page
Dialog box opens with the Selected Schedule check box active and
checked, and the Delete Items through check box inactive and unchecked, as
shown in the following image.

To
switch from purging the selected schedule(s) to purging all schedules,
uncheck the Selected Schedule check box.
-
Purge log file information for all schedules. Without
selecting a schedule, click Purge. The Purge
Log Web Page Dialog box opens.
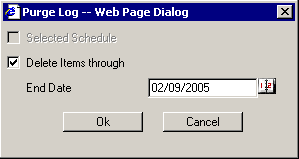
The Purge Log Web Page Dialog box
opens with the Selected Schedule check box inactive and unchecked,
and the Delete Items through check box active and checked, as shown
in the following image.

Selecting the Delete Items through check box activates the End
Date field, where you can specify the date through which you want
to purge the log records. The current date is the default value
for the End Date. To change the End Date, click the calendar to
the right of the End Date field. The Calendar Web Page Dialog box
opens.
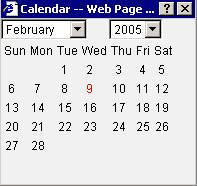
The following image shows the Calendar Web Page Dialog box, where
you can select the month and year using drop-down lists, and a day
by clicking a day on the calendar.

Click OK to purge the log file, or click Cancel to
cancel the purge request.
Note: To verify that the specified log files have been
deleted, you may want to run a log report again to note the new
log output. The deletion of log files is immediate.


